I thought it would be fun to go back and make all the recipes from the first of the year for the Bake 52 group. Some of the recipes look really good and it will be a fun way to expand my baking skills.
The first week's selection was Quiche. You can find the recipe here. I love quiche. It's so versatile! you can literally add any cooked veggie, meat, anything to it. I've even added beans and rice when I wanted a complete protein but wanted to keep it vegetarian. For this one I followed the Broccoli Quiche recipe but I added sliced chicken sausage. I enjoyed making my own pie crust but I don't think it tastes noticably different if you just use a store bought crust.
I used the traditional single-crust pie dough recipe from the book because I didn't have any cream cheese. It has butter and shortening, which is chilled first.
Then I used my food processor to blend the dry ingredients and then added the shortening and mix. Then finally the butter and pulse. The recipe then tells you to transfer this mixture to another bowl, sprinkle 4 tbls of ice water over it and used a stiff spatula to mix it together until forms a ball. I thought, "why get another bowl dirty. I'll just dump it on to my pastry cloth, sprinkle the water on and mix it with my hands.
I thought I could make a little well in the middle but the water just ran over the edges and across the mat. I had to do some chasing after the water to get it all worked in but after a bit of time and effort I got it all to come together the way it was supposed to.
I have to say my scraper was a huge help in that effort. If you don't have one I'd recommend it if you are going to do much with dough.
After letting the dough chill for an hour I pulled it out of the refrigerator and let it warm-up a bit (for 10 minutes) before rolling it out.
It's always a bit suprising to me to see those big chunks of butter in the dough after all the mixing I do. It's even more surprising to see once the dough it rolled out.
Then it's another 30 minutes (in the freezer this time) before it's ready to go in the oven. While the I blind baked the crust I got the ingredients for the filling together.
I sliced up some chicken sausage I had on hand. I bought it a long time ago for something else but never used it. Then I cut up the broccoli that I had bought and steamed it according to the directions. Then spread it on some paper towels to dry.
Look at how bright and green it is! Imagine how good it really looked, since I take all my pictures with my iPhone in artificial light. :-)
The recipe says to place the broccoli in the bottom of the pie crust and then poor the egg mixture over it. So I put in a layer of the sausage and then topped it with the broccoli.
The egg mixture is heavy on cream - 2 cups! I only had about 1 and quarter on hand so I just supplmented with 1% milk. With adding the sausage I wasn't able to pour all the egg mixture in. But I tried to get the bulk of the cheese in. Seemed wasteful to dump that down the sink. Although if I'd had a lot left I could have just made it into scrambled eggs. That would have been yummy.
I filled it fuller than recommended... I was supposed to leave a half inch from the top of the crust.
Oops... You can see why you are supposed to leave a half inch... After about 45 minutes it was down and beautiful!
It was late by the time I finished so I just left it out to cool and then cut myself a piece the next morning for breakfast...
It was so yummy! I had some for either breakfast or lunch or dinner until it was gone. The filling was soft and buttery like perfectly cooked scrambled eggs. I'm sure I'll be making Quiche again at some point in the future. It's a great way to add some veggies to my breakfast.
Saturday, January 12, 2013
Wednesday, January 9, 2013
Table Talk - Chicken Parmesan
UPDATED with pictures...
The way I normally add pictures isn't working. I ran out of time last night to do this from home so I'm doing this during lunch at work. So I don't have time to trouble shoot the picture issue. I'll try and fix it when I get home tonight and update this.
I made this dish last night and ran out of time to make the tomato sauce so it's just the chicken. Jonathan wouldn't have eaten it with tomato sauce anyway and I don't think it would be as good as leftovers with the tomato sauce on top. I think you'd only want to do that bake step with tomato sauce if you were going to eat all of it that night. Otherwise I'd store it separately. Anyway...
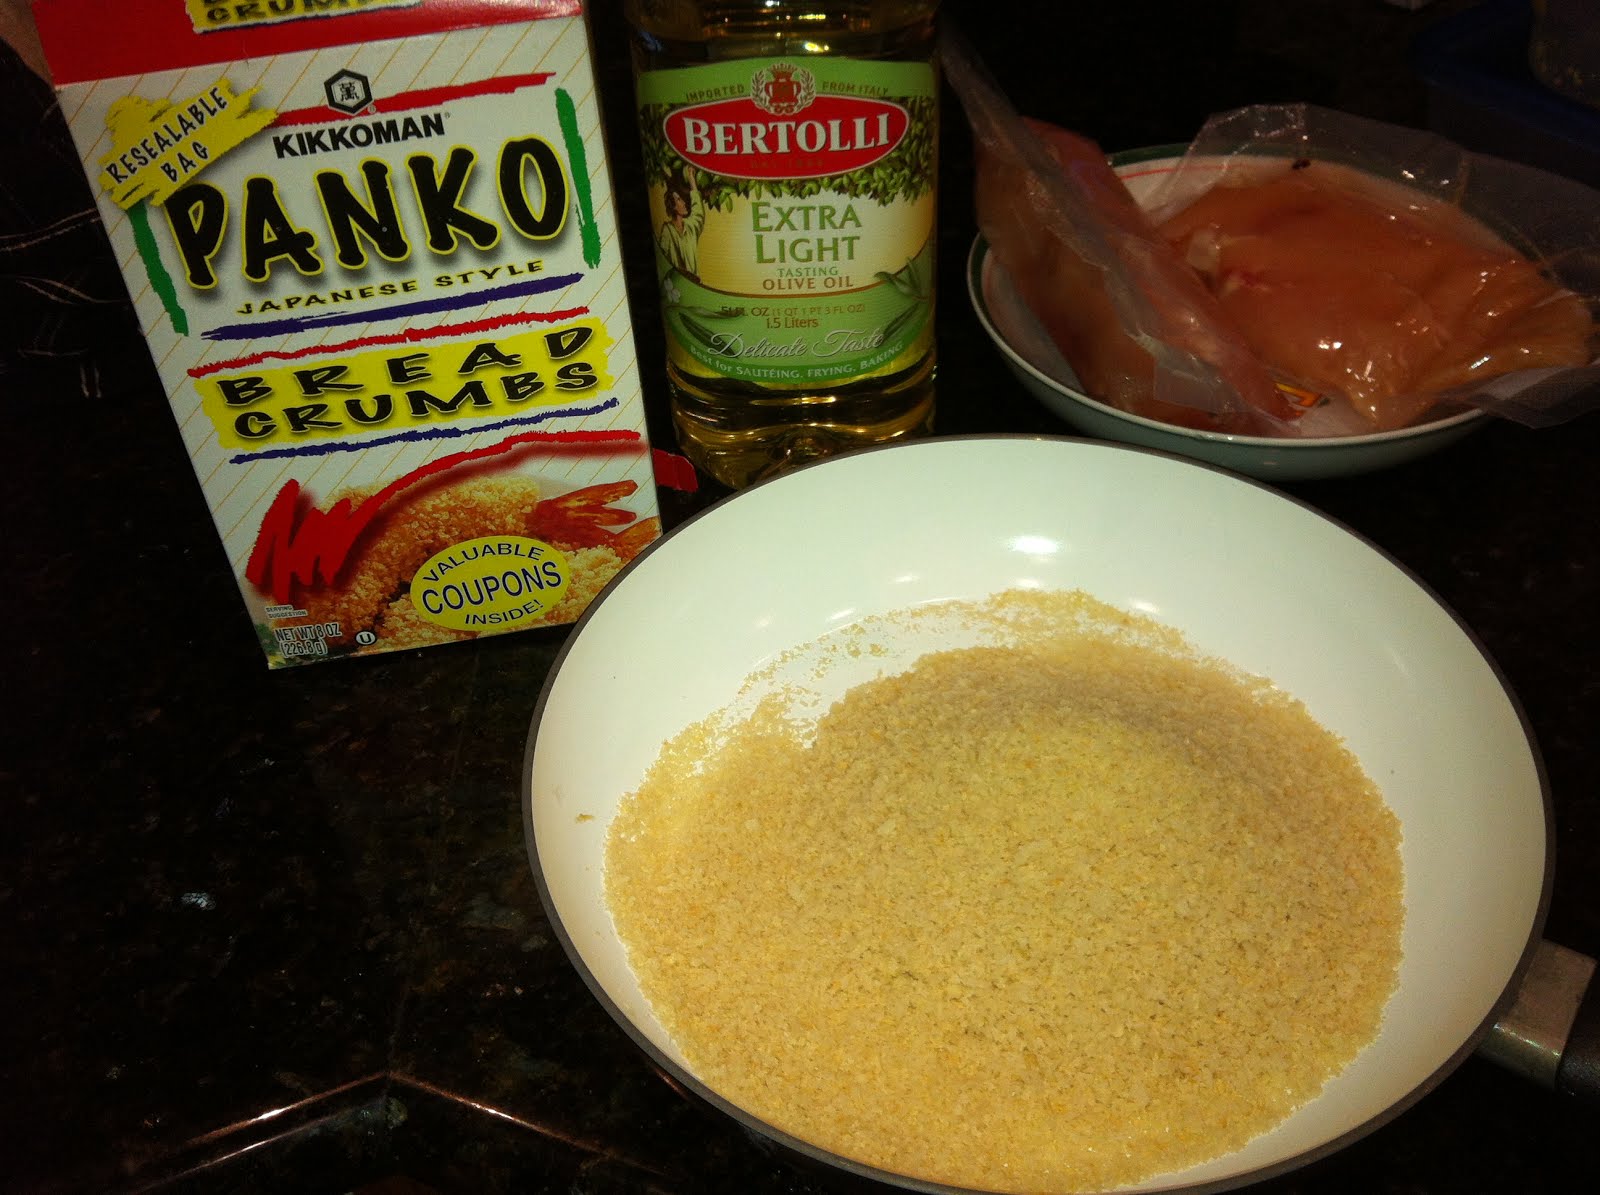
The first step was to toast the bread crumbs.
I let those go while I worked on the chicken. I set a timer so I'd stir them every two minute or so. I still got some a little dark.
I followed the book suggestion to cut my chicken lengthwise, rather than pound it thin. I ended up cutting in thirds, which I think led me to chicken that was too thin.
Overall it came out a bit dry...
Next I put together my breading station.
I had more than enough flour, egg and bread crumbs. I think patting the chicken dry before you start really improves the results. Look at how well the flour and seasoning stick under the egg.
The breading process went fairly quickly. The key was using only one hand and not stopping to wash it after every piece of chicken. I did that at first it really slowed me down. After a couple I figured out I could just scrape my hands off over the sink and keep going.
I thought I had a few bare areas (and since I had so many crumbs left over) I sprinkled some more on top. You can see that some ended up in the pan under the cooling rack.
That was a mistake. When I opened the oven after about 12 minutes it was full of smoke from the brunt breadcrumbs in the bottom. Not a huge issues but I was surprised it didn't set off the smoke detector.
A couple of the pieces came out a little dark but over all it turned out really well.
I served this with a veggie/quinoa side dish I made earlier in the week. Overall it was a very tasty meal. Jonathan said it was his second favorite chicken! That's impressive. I'm definitely going to have to make this again. I'll leave the chicken a little thicker next time and make up some tomato sauce for my serving.
Jen was our host this week. Check out her blog for the recipe.
The way I normally add pictures isn't working. I ran out of time last night to do this from home so I'm doing this during lunch at work. So I don't have time to trouble shoot the picture issue. I'll try and fix it when I get home tonight and update this.
I made this dish last night and ran out of time to make the tomato sauce so it's just the chicken. Jonathan wouldn't have eaten it with tomato sauce anyway and I don't think it would be as good as leftovers with the tomato sauce on top. I think you'd only want to do that bake step with tomato sauce if you were going to eat all of it that night. Otherwise I'd store it separately. Anyway...
The first step was to toast the bread crumbs.
I let those go while I worked on the chicken. I set a timer so I'd stir them every two minute or so. I still got some a little dark.
I followed the book suggestion to cut my chicken lengthwise, rather than pound it thin. I ended up cutting in thirds, which I think led me to chicken that was too thin.
Overall it came out a bit dry...
Next I put together my breading station.
I had more than enough flour, egg and bread crumbs. I think patting the chicken dry before you start really improves the results. Look at how well the flour and seasoning stick under the egg.
The breading process went fairly quickly. The key was using only one hand and not stopping to wash it after every piece of chicken. I did that at first it really slowed me down. After a couple I figured out I could just scrape my hands off over the sink and keep going.
I thought I had a few bare areas (and since I had so many crumbs left over) I sprinkled some more on top. You can see that some ended up in the pan under the cooling rack.
That was a mistake. When I opened the oven after about 12 minutes it was full of smoke from the brunt breadcrumbs in the bottom. Not a huge issues but I was surprised it didn't set off the smoke detector.
A couple of the pieces came out a little dark but over all it turned out really well.
I served this with a veggie/quinoa side dish I made earlier in the week. Overall it was a very tasty meal. Jonathan said it was his second favorite chicken! That's impressive. I'm definitely going to have to make this again. I'll leave the chicken a little thicker next time and make up some tomato sauce for my serving.
Jen was our host this week. Check out her blog for the recipe.
Tuesday, January 1, 2013
Richey Christmas Cookies
With it being Christmas and with all the baking I'm doing I couldn't resist making my Dad's Christmas cookies. It's a applesauce spice cookie with walnuts, raisens and chocolate chips. My dad has a huge mixer. It's got a wheat grinder and a huge silver bowl... Any way using that mixer he makes one batch that yields 100 cookies. My kitchenaid mixer can only handle a third of that but the recipe is easily divided by 3. I usually get about 40 cookies from one of my batches - obviously my cookies are smaller than my dad's.
The first step is to add the baking soda to the applesauce. If you skip this step your cookies won't ever brown. The acid in the applesauce causes the soda to bubble up and foam a bit. It also makes the applesauce a bit brown. That's just what you want.
Next you measure out the goodies (chocolate chips, raisens & walnuts). Dad always adds a bit of flour to the raisens and works through them to make sure all the raisens are separated into individual raisens and each has a light coating of flour on it so it stays separate. Don't want bite into a big clump of raisens. Yuck!
Dad always hand choppes his walnuts. He doesn't want them chopped too fine. I try and get all the pieces about the same size as the chocolate chips. I use the large milk chocolate chips by Guittard.
Next come the spices and the dry ingredients. My dad tried a lot of different ratios but never found anything that tasted better than equal parts of the four below - cinnamon, allspice, cloves & nutmeg.
Now it's time to start mixing things. First I creamed together the eggs, sugar and shortening. Dad has tried butter and oil but found that shortening gave him the best results.
After those are creamed together well...
I had to just guesstimate the size. Dad says they should be about the size of a golf ball.
I always use three cookie sheets so I can cook two at a time (once I get going). I start with one on the bottom rack. I cooked my about 11 minutes, then moved it to the top rack and then put in a new sheet on the bottom. After 11 minutes I pull my first sheet out and repeat the process with the remaining cookies.
The first step is to add the baking soda to the applesauce. If you skip this step your cookies won't ever brown. The acid in the applesauce causes the soda to bubble up and foam a bit. It also makes the applesauce a bit brown. That's just what you want.
Next you measure out the goodies (chocolate chips, raisens & walnuts). Dad always adds a bit of flour to the raisens and works through them to make sure all the raisens are separated into individual raisens and each has a light coating of flour on it so it stays separate. Don't want bite into a big clump of raisens. Yuck!
Dad always hand choppes his walnuts. He doesn't want them chopped too fine. I try and get all the pieces about the same size as the chocolate chips. I use the large milk chocolate chips by Guittard.
Next come the spices and the dry ingredients. My dad tried a lot of different ratios but never found anything that tasted better than equal parts of the four below - cinnamon, allspice, cloves & nutmeg.
I measured the flour into a bowl and then added the spices, and salt.
Then I blended all the dry ingredients with a fork. You can really start to smell the spices - I love that smell!Now it's time to start mixing things. First I creamed together the eggs, sugar and shortening. Dad has tried butter and oil but found that shortening gave him the best results.
After those are creamed together well...
Next you added the applesauce mixture. See how foaming it's gotten... That's perfect.
When you blend the applesauce in the resulting mixture looks kind of.... gross. But don't worry that's how it's supposed to look and it will turn out perfectly yummy.
Next I added in the flour/spice mixture. Doesn't that look more like cookie dough?
Finally dump in all the goodies and your dough is done.
The dough is a bit looser than a normal cookie dough but not as runny as cake dough. It results in a soft cookie, with a consistency like a pumpkin chocolate chip cookie.
Dad uses two teaspoons to drop the dough onto specially made cookie sheets. He's even scored the cookie sheets so he knows exactly how big to make the cookies to completely fill the sheet. I had to just guesstimate the size. Dad says they should be about the size of a golf ball.
I always use three cookie sheets so I can cook two at a time (once I get going). I start with one on the bottom rack. I cooked my about 11 minutes, then moved it to the top rack and then put in a new sheet on the bottom. After 11 minutes I pull my first sheet out and repeat the process with the remaining cookies.
Mine turned out a bit darker than I like (see the ones on the right) the later batches (ones on the left) are closer to the right shade. This is the first time I've made them in this oven. I think 10 minutes per rack would have been the right time. But depending on your oven it could be as long as 12 minutes per rack.
These cookies are delish right out of the oven!! They also freeze wonderfully and taste almost as good right out of the freezer as they do right out of the oven. If you like chocolate chip pumpkin cookies you'd like these, even if you don't normally like raisens and nuts in your cookies you should give these a try. I'm not one to normally like raisens and nuts in my sweets but they are really good in this cookie. Plus they make it seem slightly healthy. To me they are healthy enough to have for breakfast. :-)
Recipe:
10 oz applesauce
|
1 tsp allspice
|
1 tsp baking soda
|
1 tsp nutmeg
|
2 large eggs
|
1 tsp cloves
|
1 cup sugar
|
1 tsp cinnamon
|
½ cup shortening
|
10 oz Guittard Large milk chocolate chips
|
2 – 2/3 cup flour
|
5 1/3 oz walnuts coarsely chopped
|
½ tsp salt
|
5 1/3 oz raisins
|
Preheat oven to 350 degrees.
Mix applesauce and baking soda in a bowl. Measure flour, salt, and spices into a bowl
and mix with a fork until well blended. Measure chocolate chips, walnuts and raisins
into a bowl. Separate the raisins by
hand and add a little flour to keep them separated. Cream eggs, sugar and shortening in a stand
mixer. Add applesauce/soda mix to the
stand mixer and blend. Slowly add flour
mix to stand mixer, mix until well combined, scraping down sides as need. Add
goodies and mix until just incorporated.
Form into golf ball-size balls and drop on greased cookie sheet. Cook for 10 – 12 minutes on bottom rack, then
10 – 12 minute on the top rack or until they look done. Makes 3 – 4 dozen.
Crazy Confetti Compost Cookies
This is another recipe I made in December. One of the bloggers I follow comes up with some really unusual (or should I say "crazy"?) food combinations. Almost all of her recipes intrigue me but not enough to make them... But this one I thought... hmm... that could be good... let's try it!
It starts out just like a pretty typical cookie recipe. Mix the dry ingredients in one bowl, melt the butter and let it cool.
I creamed the butter and sugars together in my stand mixer.
Then I added in the egg, egg yolk and vanilla in.
I added peanut butter chips, sprinkles, pretzels, Salt & Vinegar chips, chocolate chunks, heath toffe chips and gramham cracker crumbs.
Look at all that good stuff in the dough. I love salty and sweet so I figured it would be good but I really didn't know what to expect taste wise.
I really liked these cookies. Every bite tastes different. They freeze great so I still have some in my freezer. But I'd recommend letting them sit out until thawed so you don't break a tooth. :-)
It starts out just like a pretty typical cookie recipe. Mix the dry ingredients in one bowl, melt the butter and let it cool.
I creamed the butter and sugars together in my stand mixer.
Then I added in the egg, egg yolk and vanilla in.
Next I gradually blended in the dry ingredients.
Pretty typical cookie dough, right? Now comes the weird part...I added peanut butter chips, sprinkles, pretzels, Salt & Vinegar chips, chocolate chunks, heath toffe chips and gramham cracker crumbs.
Look at all that good stuff in the dough. I love salty and sweet so I figured it would be good but I really didn't know what to expect taste wise.
I used my handy dandy ice cream scoop to get uniform cookie size.
All cooked up. It looks a little like I mixed in Fruity Pebbles, doesn't?I really liked these cookies. Every bite tastes different. They freeze great so I still have some in my freezer. But I'd recommend letting them sit out until thawed so you don't break a tooth. :-)
Penuche Fudge
This is another recipe I made in my baking frenzy in December. I got the recipe for this fudge off of Allrecipes. The recipe was a bit confusing... since it didn't specify the size of the dish you dumped it in... It sounded a little like they were expecting you to use a ribbed cookie sheet. So I decided to use the smallest cookie sheet I had. Turns out I should have just used an 8x8" glass pan. Next time...
As the recipe directed I buttered the cookie sheet & the sauce pan. I dumped all the ingredients (except the vanilla and nuts) in the sauce pan.
I cooked the mix over medium heat until it came to a boil.
I kept checking the temperature to see when it came down to 110. I think that was a mistake. It didn't turn to sugar... but the fudge that cooled on the thermometer did cause little bits of sugar... so when it was finally done it was smooth with some crystals. I'm going to have to try it again and just go by the temp of the pan (touch) next time.
All in all I let it get too cold. It was basically set up by the time I dumped it on the baking dish.
I spent a while trying to mash it into a flat peice but as you can see an 8x8 pan would have been much better.
As the recipe directed I buttered the cookie sheet & the sauce pan. I dumped all the ingredients (except the vanilla and nuts) in the sauce pan.
I cooked the mix over medium heat until it came to a boil.
Once it was boiling I stopped stirring and just watched the temperature. I have a great candy thermometer that alarmed when I reached soft ball stage.
Once it was at temp I moved it off the heat and let it sit - it's still boiling like crazy... That's a lot of heat!I kept checking the temperature to see when it came down to 110. I think that was a mistake. It didn't turn to sugar... but the fudge that cooled on the thermometer did cause little bits of sugar... so when it was finally done it was smooth with some crystals. I'm going to have to try it again and just go by the temp of the pan (touch) next time.
Once it was at 110 I added in the vanilla and mixed until it lost its gloss.
Not that it ever lost its gloss... I just finally gave up and dumped in the pecans. All in all I let it get too cold. It was basically set up by the time I dumped it on the baking dish.
I spent a while trying to mash it into a flat peice but as you can see an 8x8 pan would have been much better.
All in all it's a pretty straight forward recipe but I would have been better off if I had followed my instincts instead of following the recipe so literally. I love fudge so I'll be trying this again... at some point.
Subscribe to:
Posts (Atom)