Wednesday, January 23, 2013

Table Talk: Stir-Fried Beef & Broccoli


Welcome to week two of Table Talk.  This week we did a beef dish.  I made a mistake with this recipe and didn't realize it until I pulled out the recipe to type the correct name for the recipe.  When I got to broccoli I realized I forgot the Classic Brown Stir-fry sauce.  Opps!  It was still really tasty, after I put some salt on it.  :-)

The recipe calls for the beef to be marinated in low-sodium soy sauce and Chinese rice cooking wine.  I didn't have Chinese rice cooking wine and I've never had occasion to use it and have never read a recipe that does use it.  So I decided I wasn't going to buy it for the 2 tsps in the marinade (there's some in the the stir-fry sauce too but only a quarter of a cup).  Instead I used white wine vinegar.  I know vinegar is just wine that has "turned" so I figured it was close enough.  :-) 


While the meat marinated I got started on prepping the vegetables.  I couldn't find any scallions in the tiny little grocery store I go to between monthly trips to Lancaster so I used an onion.  I also don't like ginger so I decided to leave that out. 

The first step was to mix the scallions (onion), garlic and ginger (if I'd been using it) with 1 tsp of oil.  I set that aside, cut up the brocolli and the red peppers. 

Once the veggies were prepped I cooked the meat. 

Next I dumped the broccoli in with a little water found a lid (it was too small but I picked a pan I don't have a lid for!) and let the broccoli steam for a couple of minutes. 

Once the broccoli was done I let the the water evaporate and then put in the red peppers and cooked those for a couple of minutes. 

Then the onion mixture went in.  At this point I realized I should have picked a bigger pan!

I managed to get all the veggies mixed together with only a little mess.  I let it cook until the onions were soft. 

Finally the beef went back in the pan.  At this point I was also supposed to add the classic brown stir-fry sauce but I totally missed that!

After one bite I thought, "this is really bland"  I got up salted the whole dish and it was very tasty at that point!  I didn't miss the sauce at all. 
I really liked the ratio of veggies to meat in this dish.  At only 290 calories per serving (if made according to the recipe) it's very low calorie for a main dish.  Check out Amanda's blog for the full recipe.  The calorie details below are for how I made it. 


Tuesday, January 22, 2013

Bake 52 Rewind Week 2: Bran Muffins

These  muffins are supposed to be made with raisens.  I had raisens but I read some of the other blogs from last year and a few bloggers used chocolate chips.  Well, chocolate chips are much better than raisens! 

The recipe tells you to grease a muffin tin.  I just used liners.  Much easier...

I used my magic bullet to grind up half the bran cereal and then measured the second half into the same container. 

The recipe calls for molasses.  I didn't have any and never use it so I decided to leave it out.  I had some dark brown sugar (which just has more molasses than light brown sugar) so I used that. 

I mixed the brown sugar with the egg, the egg yolk and the vanilla.

Then I mixed in the yogurt.  I upped the yogurt to just under two cups to replace the three tablespoons of molasses.  That was the moisture content was still the same (I hoped!). 

Once the melted butter, yogurt and cereal were mixed in I set it aside for the cereal to soften. 

Next I measured out the dry ingredients, mixed them and then dumped the wet mixture on top of it. 

I folded the wet ingredients into the dry ingredients, just until everything was combined.  Then I dumped in the chocolate chips.  Yum!

To use up all the batter I had to fill the muffin cups very full. 

After 20 minutes in a 400 degree oven I had warm chocolate chip bran muffins. 
The bran flavor is very pronounced!  If you don't like bran flavor you won't like these muffins.  I liked the chocolate chips but I bet the raisens would have been good too - not as good as chocolate but still very sweet. 

If you want to make these muffins check out Valerie's blog for the complete recipe. 


Monday, January 21, 2013

Bake 52 Rewind Week 6 Challah

So I had planned to make the Bake 52 recipes in order.  But I failed to look at the week 2 recipe (Bran muffins) before I went grocery shopping for the week.  So when I pulled out my book to bake I was annoyed to realize that I didn't have all the ingredients I needed and I couldn't think of a good substitute for what I was missing. 

So I started looking through the recipes until I came to one that I had all the ingredients for - Challah.  You can find the complete recipe at Jen's blog

This is a pretty straight forward bread recipe.  The fancy stuff all comes from how you put the loaf together.  First step whisk the liquids (water, butter, eggs and an egg yolk) together. 

Second step mix the dry ingredients together. 
Then I dumped in the wet ingredients while the mixer ran.  The dough came together nicely and fell right off the dough hook after I'd run the mixer for a while to knead it. 

I used the mixer bowl to let the dough rise. 
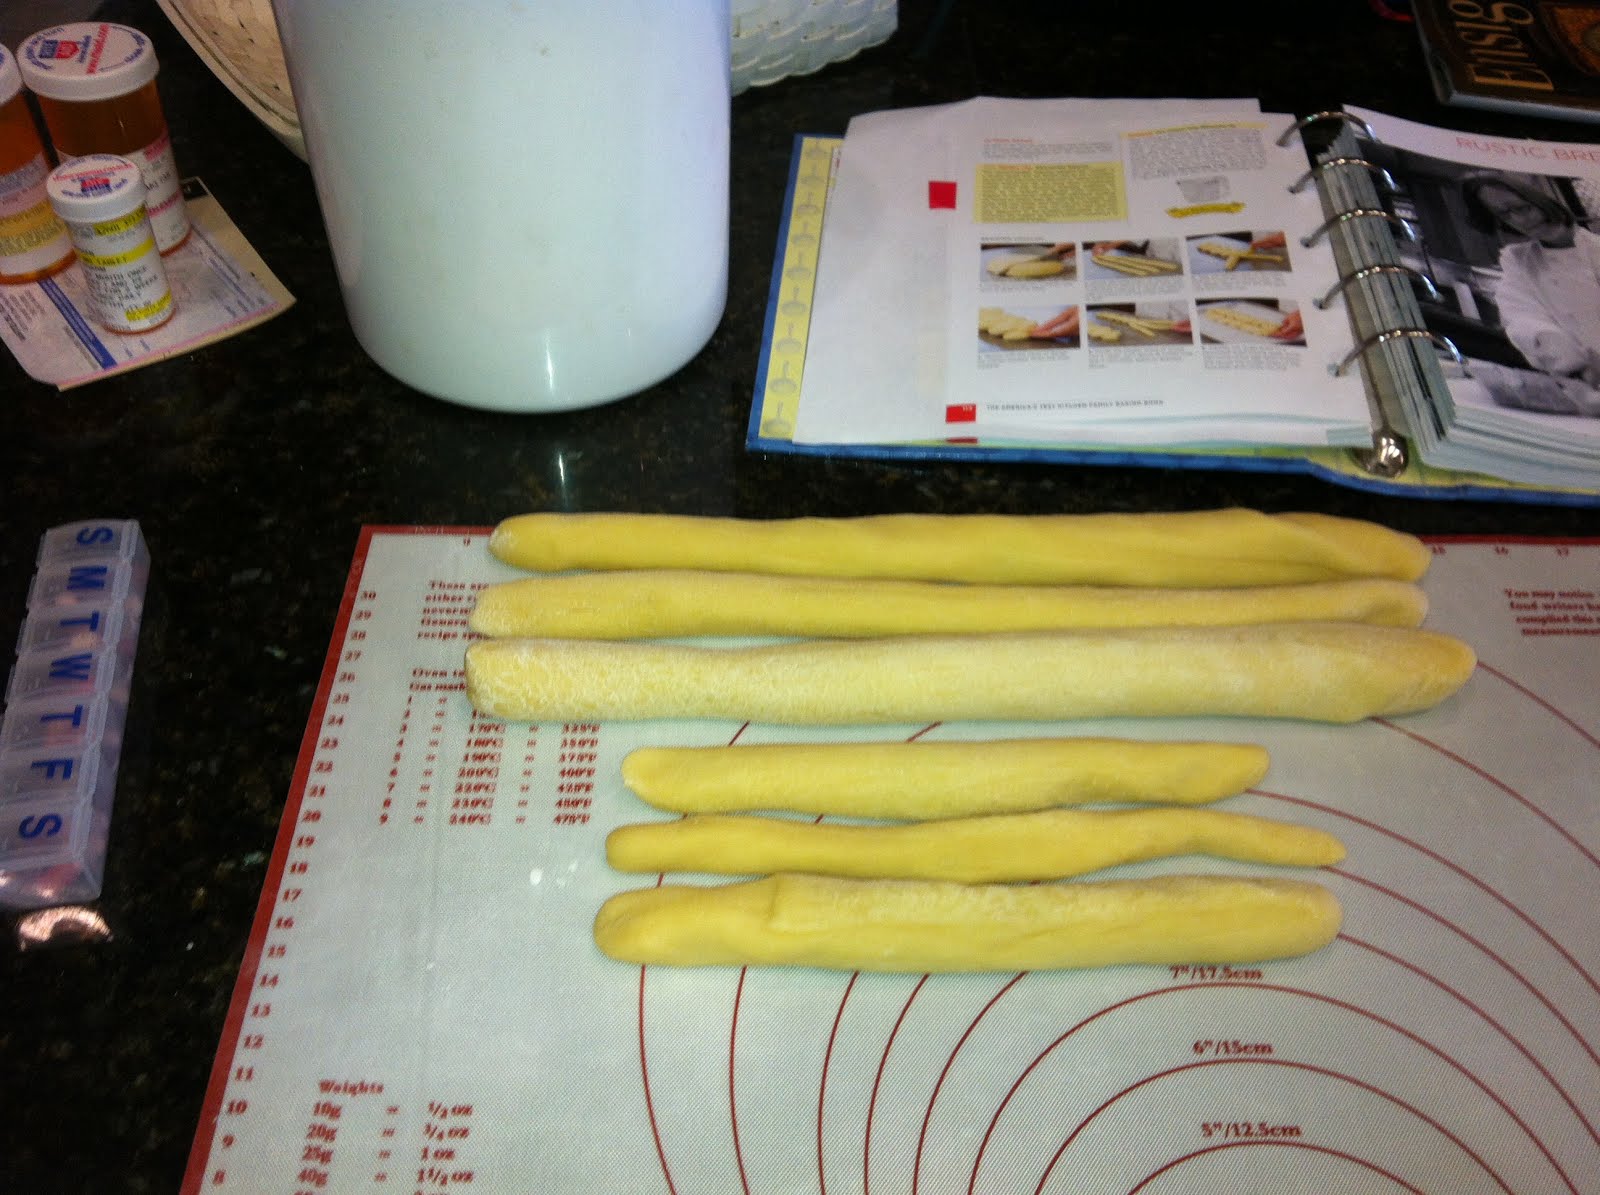
After about 2 hours I dumped it out onto my pastry cloth to start putting the loaf together. 

I split the dough into two pieces.  One piece is supposed to be twice as big as the other.  I don't know if my pieces are the right sizes...
Then I divided each of those pieces into three equal (or about) size pieces. 


The next part was the hardest part for me.  I don't know if I lack some dough rolling gene or if I jus don't have the patience for it.  I never did get the pieces as long as they were supposed to be.  I couldn't get them to uniform thickness either, and you can see that my pieces weren't very even to begin with. 

When I had given up on rolling out dough I braided the dough.  I found that you wanted to "braid" it tightly to make it look like the pictures in the book.  I had a hard time getting the dough to stick together.  You can see how the ends on my top braid are separated.  I think that might be because I used too much flour in rolling out the dough. 

I also realized at this point that I was supposed to save the egg white from the egg yolk that I used in making the dough.  I almost skipped the egg white glaze, but decided that eggs were cheap enough to crack another one. 

I think I cooked it longer than I should have.  The bottom and the edges were really dark.  It wasn't a big deal when the bread was warm but the next day it was pretty tough and overcooked tasting.  My top braid also tipped to the side as it bake. 

I had just moved it to a cooling rack to cool down when Jonathan walked by, ripped the whole top braid off and then took half of it to eat.  He liked it warm (he likes any warm bread product!) but wasn't too impressed with it the second day. 

I didn't think the bread was anything special and the braiding was kind of a pain.  But if you want a bread that looks really impressive but doesn't take a lot of time or work (if you have the skills to roll dough into a snake) this is a great recipe for you. 

Saturday, January 19, 2013

Caramel Stuffed Cookies

That's not what Laura calls these cookies.  But I'm not much for long recipe names.  I should call this recipe Irresistible Chocolate Cookies.  This recipe says you'll end up with 18 cookies.  I only got 15 and I ate all but 5 of them in 2 days!  I finally took the last five to work to stop myself!!  These are sooooo good! They are best right out of the oven.  Second best would be frozen or chilled and finally at room temperature. 

They are really pretty simple too.  I started by sifting my cocoa powder through a fine mesh screen onto some wax paper. 
Then I used my mini blender (it's a magic bullet) to blend the milke with the cocoa.  I didn't have any whipping cream so I just used the milk I had on hand (1%). 

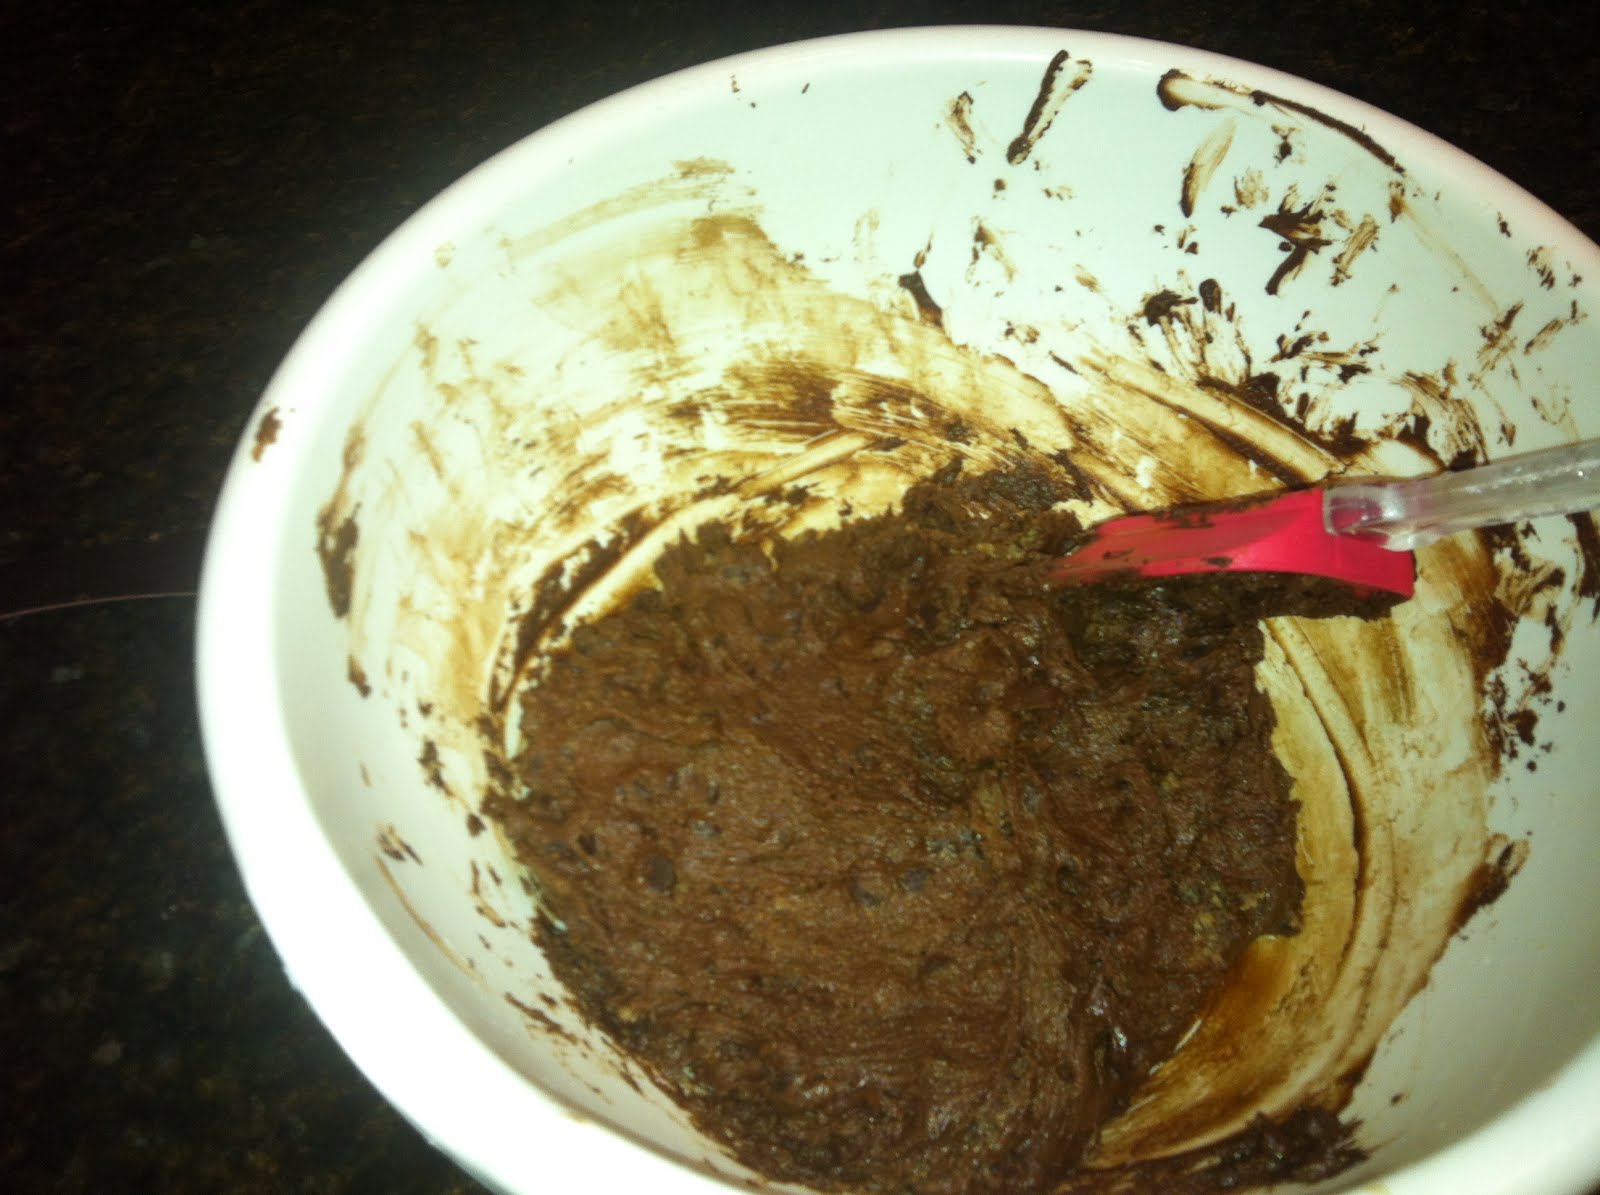
Next I broke up the cookie dough into a bowl and dumped in the mini chocolate chips.  I really think using mini chocolate chips is critical to this recipe.  They are so small that they stayed melted even the next day, and really gave the cookies a truffle consistency.  That was one thing that was so yummy about these cookies.  Finally I added the cocoa/milk mixture. 
I used my hands to mix it together.  That was pretty messy and sticky.  Plus when I scooped out the dough later I still found tiny pockets of dough that didn't have any cocoa powder in them. 

The dough was really tasty on it's own.  Jonathan really liked the dough.  Between the two of us we probably ate two cookies worth raw.  I assume that (and that my scoop might have been a little big) is why I only got 15 cookies instead of 18. 

Then I just used my handy cookie/ice cream scoop to dish out the cookies.  I filled it full with dough.  Then I pushed a Rolo into the center.  That pushed out enough dough that it didn't take much to just mush it around the Rolo to get full coverage.  It's really sticky dough so I tried to minimize handling it too much. 

I crammed all the cookies onto one cookie sheet to freeze them for 15 minutes and then I split the cookies between two cookie sheets for cooking. 

While the cookies froze and the oven preheated I unwrapped the Rolo's for the "chocolate" drizzle. 


I let the cookies rest on the cookie sheet for a couple of minutes before moving them to a cooling rack. 

One of the cookies kind of fell apart as I moved it to the cookie sheet.  You can see the caramel peaking through the chocolately cookie. 

After the cookies had cooled I drizzled the melted Rolos over them and sprinkled it with Kosher Salt.  I don't think the drizzle added to the flavor or experience other than giving the salt something to stick to.  The salt gave the cookies that wonderful salty/sweet contrast.  I didn't use as much salt as the recipe called for so I only got the salty/sweet contrast in some bites.  I really liked it that way because I also really liked the just sweet bites.  Those bites were super chocolately and wonderfully rich. 
If you plan to store these cookies you probably would want to skip the chocolate drizzle.  It made them really messing when I stored them (for one measly day!) in layers.  So if you have more will power than me and do store them with the chocolate drizzle in place, store them in one layer in a ridge plastic container.  The ziploc was even messier than the cookies stacked on top of each other. 

I'll have to make these again at some point...late on a Sunday night so I don't have time to eat too many before I can take them to work... Jonathan was very disappointed when he went looking for one two days later and there weren't any.  He had only had a half of one the night I made them.  Poor guy!

Thursday, January 17, 2013

Butterfinger Cookie Dough Cheesecake Bars

So with all the cooking I couldn't skip making something sweet.  I picked this dish because I'd bought some cream cheese for it a few weeks ago and I was worried it would go bad if I waited any longer to make it.  I found the recipe at Bakers Royale.  Overall it was just okay...  I could tell it was a general opinion.  It took almost all day for the ones I took to work to get eaten. 

But then mine didn't look anything like the pictures on the blog so maybe I did something wrong.  The first layer is a chocolate chip cookie dough.  But it's really sticky, not your traditional cookie dough.
After I'd made the cookie dough I mixed up the cheesecake layer, which is not much more than just cheesecake and sugar, with an egg to help it set up in the oven. 
Then it was time to assemble. 
I couldn't find any king size Butterfingers at the grocery store and every one of my candy bars was broken.  So I put a candy bar down the middle so I got pretty even coverage.
Next I poured the cream cheese mix over the top, put the rest of the cookie dough on top of that and then covered the whole thing with mini chocolate chips.
Into the oven it went! 

Looking at the pictures on the blog and my pictures I'm pretty sure I over cooked it.  Bummer. 
The foil sling made it a snap to get out of the pan and cut up.

Even nearly burnt these were pretty tasty.  So if you like cheesecake and butterfinger I'd recommend these.  I probably won't try them again because I'm not a huge cheesecake fan.  But I still liked them.

Tuesday, January 15, 2013

Broccoli and Cauliflower Casserole

To make it easy to get my veggies in at every meal I wanted to make sure I had something yummy to eat.  I found this recipe at Allrecipes.com.  It includes rice so you get your starch and veggies all in one dish.  I decided to switch out the rice for quinoa because it's higher in protein and I like it better than brown rice.  All the recipes for quinoa tell you to rinse it thoroughly before you cook it.  I never had.  It's supposed to remove the bitterness.  I've never noticed the bitterness but I have noticed a kind of weird taste.  I figure the next time I use it I'll have to try rinsing it and see if the flavor is better. 

You make it just like you make rice (other than the rinsing).  So it's direct replacement.  I didn't use the full cube of butter the recipe calls for.  It seemed excessive.  I just melted a pat of it to cook the onion in. 

I think a pound of processed cheese food is excessive too at least in terms of a ratio to veggies.  If/when I make it again I'd either half the cheese (or more likely) up the veggies by half. 

I mixed the milk and cream of chicken soup in my mini blender before I mixed all the ingredients together in a 13x9" pan. 

I used about a tube and a half of Ritz crackers for the top.  Then it all went in the oven.  Thirty minutes later I had a yummy veggie casserole that I've been eating all week. 

Once it was in oven I realized I hadn't taken any picture...  Oh, well.  I figure the most important picture is the one of the finished product and I remembered that.
It's pretty cheesy - you can really taste the Velveeta.  So if you don't like it this isn't the dish for you, otherwise it's pretty delish.  You could mix and match the veggies to suit your tastes and what looks good the store.  My kind of recipe - flexible!

Sunday, January 13, 2013

Baked Frittata w/Artichokes, Sun Dried Tomatoes & Feta

I thought this year I would get back to doing more cooking and get away from eating frozen entrees for more than two thirds of my meals.  I found this recipe at Two Peas & Their Pod.  When I pre-cook my meals I always look for recipes that include veggies for my breakfast.  It's much easier to have 5 servings of fruit or vegtable if you have veggies at every meal. 

I've tried lots of different fritta and quiche recipes.  I've even tried to make up my own recipes, but I'm not very good at figuring out ingredients that complement each other.  I've also tried cooking with sun dried tomatoes before.  I haven't been too impressed with the flavor but I keep trying because I think I should like them.  This time I used oil packed instead of water because that was all they had at Wal-mart.  It was a bit improvement in the flavor! 

I really liked this combination of artichokes, sun dried tomatoes and feta cheese.  But I only bought 4 oz of feta - I should have got 8 but I was worried I'd have left overs that I didn't know what to do with.  Turns out they suggest topping it with extra cheese if desired, so 8 would have been perfect.  Instead I added some mozzeralla to the top.  It was good but the best bites were the ones with the tangy flavor of feta with the tomato or artichoke. 

Oh well, next time I'll know.  It's a simple recipe, but it uses a lot of eggs!

Saute the onion and garlic.
Then I diced up the artichoke hearts (there were a lot of those too!) and the sun dried tomatoes...
I hate using more dishes than I have to, so I blended about half the eggs, dumped them in the pan, added the rest of the ingredients, mixed a bit and then dumped the rest of the eggs in. 
I added some mozzarella and it was ready to go in the oven.  It took about 45 minutes to bake. 

Looks tasty.  I've been enjoying this for breakfast all week!