So I continued my quest to bake all the dishes I missed the last year in the Bake 52 group. This was really delicious! Jonathan had two! So you know they are really good when Jonathan wants seconds. You can find the full recipe on Amanda's blog.
I started with the pastry cream. It has to chill for about two hours so it was the first thing I made (all day as a matter of fact). It calls for 3 egg yolks. I saved the egg whites because I'm planning on making angel food cake next week and it calls for 12 egg whites.
While I was measuring out these ingredients I got the cream heating on the stove.
I mixed the sugar and salt into the egg yolks. Then I dumped in the cornstarch and mixed it in.
On the first stir I ended up with cornstarch all over the counter. I wiped what I could back into the bowl and tried to be more careful...
While the cream continued to heat I prepped everything else. Last time I made this, the next part went really fast.
That white blog in front of the white bowl is the butter.
Jonathan was sweet enough to take a picture while I tempered the eggs. Then I dumped it all back into the pan and added the butter and vanilla.
Once it was all blended together the cream went into another bowl, I covered it with plastic wrap and stuck in the frig.
While the pastry cream chilled I made some other things which I'll blog about later.
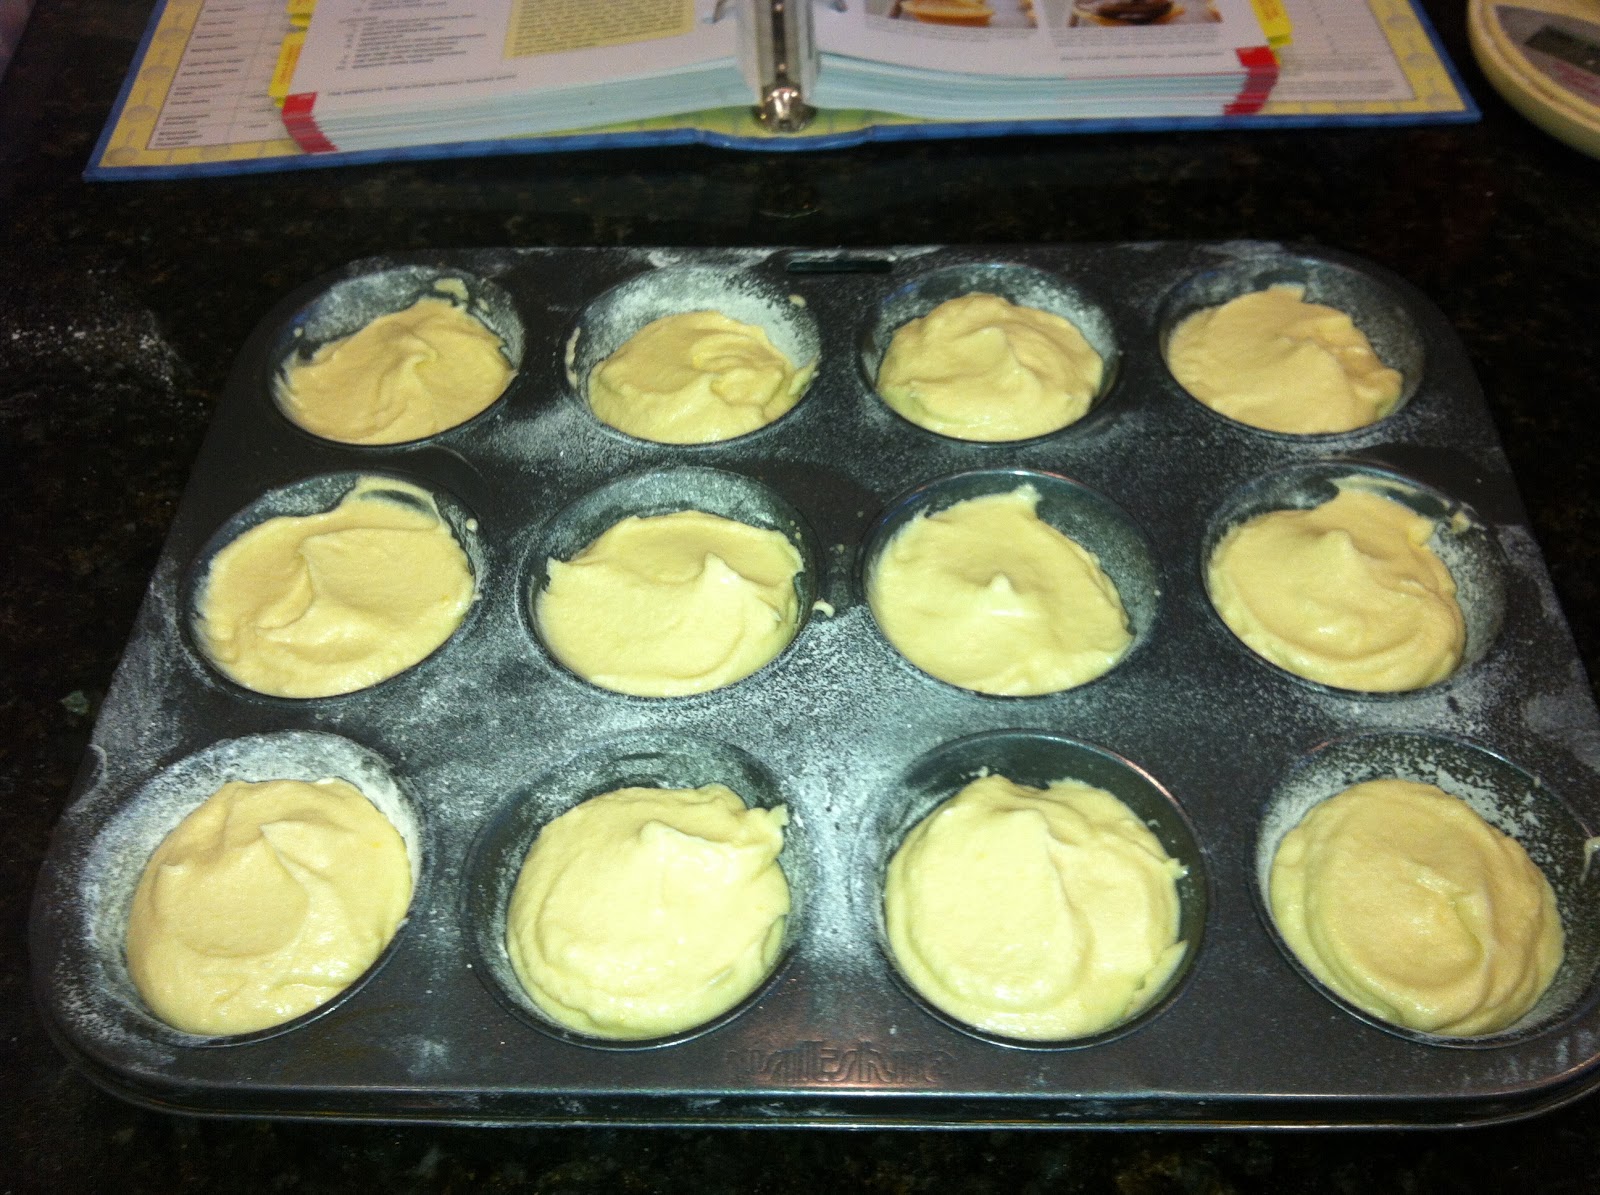
After about an hour and a half I started on the cupcakes. I wanted to be sure that the cupcakes would come out clean so I was careful to grease and flour the cupcake tin as directed in the recipe.
The cupcake batter was pretty straight forward. Except I forgot to add the pieces of butter to the dry mix one at a time.
It took a little while but I finally got all the butter mixed into the dry ingredients. There were a few bigger pieces but I figured it was good enough.
I mixed in the three eggs one at a time - at least I remembered that part.
It got really thick. Then I dumped in milk and vanilla. I didn't bother to buy whole milk. I just used the 1% I had on hand.
I didn't worry about using a 1/3 cup measure to load up the cupcake tin, I just tried to make sure I had an even amount in each cup and used up all the batter.
Twenty minutes later they were done.
After they had cooled ten minutes in the pan I moved them to a cooling rack. While the cooled the rest of the way I made the chocolate glaze.
I used semi-sweet chocolate because I've found in past recipes that bitter sweet chocolate is too dark for me.
While the chocolate glaze cooled I started loading up the cupcakes.
I didn't use up all the pastry cream. I figured I only used about half of it. But I made sure to use all of the chocolate glaze! You just can't have too much chocolate.
Jonathan and I had as soon as they had chilled 10 minutes.
As we finished Jonathan turned to me and said, "Janet... you somehow gave me an empty plate!"in a really pitiful voice. :-) So I got him a second one. But I told him I was taking the rest to work to save us both from ourselves!
I worked up the nutrition information. This is based on using only half the pastry cream, so take it with a grain of salt...
The over four hundred calories didn't stop me from eating every bite!
Tuesday, January 29, 2013
Sunday, January 27, 2013
Spinach Artichoke & Roasted Red Pepper Cheesy Squares
I got this recipe from Averie. Very colorful and made up of things that can be kept on hand. Nice!
It's also a very easy recipe. I whisked a couple of eggs, dumped in the artichokes (oil/juice and all), cut up the peppers a bit and dumped them in and then added the spinach. I ended up buying a 16 oz bottle of peppers instead of a 12 oz, but I used all of them. I also increased the spinach to about 1.5 cups.
I added a cup of cheese and decided that was enough... after adding a half a cup of bread crumbs (Panko because that's what I had..)
I dumped the whole thing into a pan lined with aluminum foil and stuck it in the oven for about an hour.
I forgot to get any pictures after I baked it. Mine wasn't very square like... I think I'd need more eggs to get it to set up like she did. But I liked the flavor.
It's also a very easy recipe. I whisked a couple of eggs, dumped in the artichokes (oil/juice and all), cut up the peppers a bit and dumped them in and then added the spinach. I ended up buying a 16 oz bottle of peppers instead of a 12 oz, but I used all of them. I also increased the spinach to about 1.5 cups.
I added a cup of cheese and decided that was enough... after adding a half a cup of bread crumbs (Panko because that's what I had..)
I dumped the whole thing into a pan lined with aluminum foil and stuck it in the oven for about an hour.
I forgot to get any pictures after I baked it. Mine wasn't very square like... I think I'd need more eggs to get it to set up like she did. But I liked the flavor.
Friday, January 25, 2013
Candy Bar Caramel Corn
I love that fancy popcorn with drizzles of chocolate and all sorts of extras mixed in. So when I saw this recipe I knew I had to try it. I've made caramel corn before and always used my super big bowl.
For the popcorn I used this great gift Jonathan and I got for Christmas this year from Mike & Julia. It works great. Nearly every kernal pops. It only takes about three minutes in my microwave and a third of a cup gave me 8 cups. I decided to double the recipe... so I made 3 batches.
For the candy bars I used Peanut Butter Snickers...
Twix..
Kit Kats...
and butterfingers.
Once the popcorn was done
and the candy bars all chopped up and mixed
I started on the caramel.
While the butter melted I covered a couple of half sheet pans in aluminum foil and sprayed them.
The recipe doesn't specify a temperature or anything for cooking the caramel, just times. But it worked out nice and hard, but that might be because of the baking step at the end.
After the caramel was done I got Jonathan to dump it over the popcorn while I kept the popcorn moving so I got a pretty good distribution.
I kept stirring until there wasn't any caramel puddled anywhere and the popcorn was covered pretty well. Then I stirred in about half of the candy bars. The caramel was still warm enough that the chocolate all melted.
Then I spread the popcorn on the two prepared sheets and stuck them in the oven. I stirred them after about 5 minutes and then cooked them for another 10 minutes.
Cooking it in the oven melted all the caramel and peanut butter from the candy bars too. The caramel set up really nicely. I spread the remaing candy bar pieces and let the whole thing cool.
I managed to fill 30 snack bags with all this stuff. Yum! At about 200 calories it's perfect for a little snack/sweet... as long as I can stick to one a day. :-)
For the popcorn I used this great gift Jonathan and I got for Christmas this year from Mike & Julia. It works great. Nearly every kernal pops. It only takes about three minutes in my microwave and a third of a cup gave me 8 cups. I decided to double the recipe... so I made 3 batches.
For the candy bars I used Peanut Butter Snickers...
Twix..
Kit Kats...
and butterfingers.
Once the popcorn was done
and the candy bars all chopped up and mixed
I started on the caramel.
While the butter melted I covered a couple of half sheet pans in aluminum foil and sprayed them.
The recipe doesn't specify a temperature or anything for cooking the caramel, just times. But it worked out nice and hard, but that might be because of the baking step at the end.
After the caramel was done I got Jonathan to dump it over the popcorn while I kept the popcorn moving so I got a pretty good distribution.
I kept stirring until there wasn't any caramel puddled anywhere and the popcorn was covered pretty well. Then I stirred in about half of the candy bars. The caramel was still warm enough that the chocolate all melted.
Then I spread the popcorn on the two prepared sheets and stuck them in the oven. I stirred them after about 5 minutes and then cooked them for another 10 minutes.
Cooking it in the oven melted all the caramel and peanut butter from the candy bars too. The caramel set up really nicely. I spread the remaing candy bar pieces and let the whole thing cool.
I managed to fill 30 snack bags with all this stuff. Yum! At about 200 calories it's perfect for a little snack/sweet... as long as I can stick to one a day. :-)
Thursday, January 24, 2013
Sausage, Mushroom & Green Chili Breakfast Casserole
I found this recipe on Taste and Tell Blog. It's another big breakfast casserole. I started with french bread. I sliced up about three-quarters of a loaf to get the 10 cups.
After slicing the bread I cut it into squares... not very consistently sized squares but I figure it won't effect the final dish.
The bread pretty much filled the 9x13" pan.
Next step - brown the sausage. I used maple flavored because I love that bit of sweetness with my sausage.
After it was done I moved it to a bowl and cooked up the mushrooms.
Once they were nice and brown I seasoned them with salt and moved them into the bowl with the sausage.
When I planned this dish for my next breakfast I thought I had green chiles in my food storage. I used to alwasy keep some in storage when we were in Utah. But when I went to get them I couldn't find them. Bummer! Now what??
I decided I'd just add in some salsa. To keep the moisture content more consistent with the original recipe I drained the salsa.
I put in about a half a cup. The recipe called for 8 oz of green chiles but I was worried if I did a full cup it would make the dish too spicy for me.
I mixed those together, spread it over the top of the bread. Then spread the cheese on top of that.
Next I used my magic bullet to mix up the eggs. Then I mixed them with the milk and half-and-half. I poured the egg mix over the casserole and then pressed down on it a bit to make sure the bread soaked up the mix evenly.
Then I covered it and stuck it in the frig overnight.
After 50 minutes in the oven it was bubbly goodness!
I let it cool down before I had a piece. It was pretty good. I think next time (if there is a next time) I'd add some cooked veggies like broccoli or cauliflower with the sausage. I could have easily added a full cup of salsa. But next time I'd just make sure I had the green chilis on hand.
I thought I'd figure out the nutrition on my recipes. This is based on how I made it and using Calorie Count (an online calorie tool).
It's on the high side for fat content but it fits my 300 - 400 calories for breakfast criteria.
After slicing the bread I cut it into squares... not very consistently sized squares but I figure it won't effect the final dish.
The bread pretty much filled the 9x13" pan.
Next step - brown the sausage. I used maple flavored because I love that bit of sweetness with my sausage.
After it was done I moved it to a bowl and cooked up the mushrooms.
Once they were nice and brown I seasoned them with salt and moved them into the bowl with the sausage.
When I planned this dish for my next breakfast I thought I had green chiles in my food storage. I used to alwasy keep some in storage when we were in Utah. But when I went to get them I couldn't find them. Bummer! Now what??
I decided I'd just add in some salsa. To keep the moisture content more consistent with the original recipe I drained the salsa.
I put in about a half a cup. The recipe called for 8 oz of green chiles but I was worried if I did a full cup it would make the dish too spicy for me.
I mixed those together, spread it over the top of the bread. Then spread the cheese on top of that.
Next I used my magic bullet to mix up the eggs. Then I mixed them with the milk and half-and-half. I poured the egg mix over the casserole and then pressed down on it a bit to make sure the bread soaked up the mix evenly.
Then I covered it and stuck it in the frig overnight.
After 50 minutes in the oven it was bubbly goodness!
I let it cool down before I had a piece. It was pretty good. I think next time (if there is a next time) I'd add some cooked veggies like broccoli or cauliflower with the sausage. I could have easily added a full cup of salsa. But next time I'd just make sure I had the green chilis on hand.
I thought I'd figure out the nutrition on my recipes. This is based on how I made it and using Calorie Count (an online calorie tool).
It's on the high side for fat content but it fits my 300 - 400 calories for breakfast criteria.
Subscribe to:
Posts (Atom)