Thursday, January 31, 2013

Cauliflower alla Parmigiana

I found this recipe on Pillsbury's website.  I'm always looking for good, easy, veggie sides.  Jonathan isn't a big fan of vegtables as you can imagine.  When I cook dinners he likes I have to have the veggie separate from everything else.  He just likes really simple things.  Any one pot meal is not his thing.  So lately to try and eat more veggies I've been making a vegatable side dish on the weekend that I can than eat as leftovers with whatever I make for the main dish and carb for me and Jonathan. 

I had some left over cauliflower so I used it plus the head I had purchased for this recipe.  The head I purchased with the roots and leaves was about a pound and a half.  So I figured once I cut what I had into florets and got rid of the core I had a pound and a half of cauliflower that I used in the recipe. 
I cut it all up in to florets and then dumped in a pot of boiling water for about 3 minutes.  I could have cooked it even less time.  It was very soft and tender after cooking the oven...

Once it was done I dumped the florets out and sliced it into pieces that were about the same in width.
The recipe calls for you to "arrange the slices, overlapping them tightly"  I just dumped all of it into the prepared pan.  Those flexible cutting boards really come in handy for stuff like this.
I seasoned the cauliflower and the dotted the top with butter.
Then I spread parmesan cheese and lemon flavored bread crumbs across the top. 
The whole thing went in the oven for about 30 minutes, until it was nice a brown.
So this is where my plan fell apart... I decided to have this as my side with the Shrimp dish I made for lunch because it doesn't have any veggies.
It worked out really well because they are both lemon flavored.  I'll post the shrimp recipe in the near future... it's very easy. 
If you like cauliflower this is an easy dish that looks like of elaborate and fancy.  It's also wonderful as leftovers!

Wednesday, January 30, 2013

Medsker's BBQ

The super bowl is next Sunday (or so I hear :-)) and every year (in the past) we've had a super bowl party at the Medsker's house.  Medsker always makes his BBQ, which if you talk to Boomer (or really anyone outside of the family) it's more like a sloppy joes recipe.  Either way it's great and super easy.  I made it for last Sunday dinner, a week early, but until I talked to Jade today on the phone I didn't realize it would have been more appropriate to wait a week. 

A single batch makes about 12 - 14 sandwiches.  You start with 2 pounds of ground beef.  I've made it with a 90% lean beef, but it makes for really dry leftovers.  So now I always make it with 80% lean beef.  The "real" recipe calls for 1/3 cup chopped onion and 1/2 cup chopped celery.  I always leave out the celery because I don't like it and never know what to do with the leftovers.  I also like to use dried onions because I always those on hand but don't always have a fresh onion.  Jonathan has never complained so it must be pretty similar.

While the hamburger browns and the onions soften I started putting together the sauce ingredients.
I mixed it all together in a measuring cup.
Once the hamburger was nicely brown..
I dumped in the sauce and mixed it well.
Then I just let it simmer for 45 minutes.  Easy, peasy.
I worked up the calories again, including the bun.  Jonathan let me get whole wheat buns, surprise, surprise...
I did the calories based on 12 servings and these buns. 
I don't know how to do a fancy printable like a real food blogger but I'll type up the recipe below so you can just copy and paste it to a word document if you do want to print it.

Medsker's BBB

2 pounds ground beef (80% lean)
1/3 cup chopped onion (fresh or dried)
½ cup chopped celery
2 Tbsp. brown sugar
2 Tbsp. Worcestershire sauce
2 Tbsp. White Vinegar
¼ tsp. salt
1 Tbsp. mustard
1 cup ketchup
½ cup hot water

Brown hamburger with onions and celery.  Meanwhile combine the other ingredients and add to hamburger when browned.  Simmer 45 minutes. 

Tuesday, January 29, 2013

Bake 52 Rewind Boston Cream Cupcakes

So I continued my quest to bake all the dishes I missed the last year in the Bake 52 group.  This was really delicious!  Jonathan had two!  So you know they are really good when Jonathan wants seconds.  You can find the full recipe on Amanda's blog. 

I started with the pastry cream.  It has to chill for about two hours so it was the first thing I made (all day as a matter of fact).  It calls for 3 egg yolks.  I saved the egg whites because I'm planning on making angel food cake next week and it calls for 12 egg whites.

While I was measuring out these ingredients I got the cream heating on the stove. 
I mixed the sugar and salt into the egg yolks.  Then I dumped in the cornstarch and mixed it in.
On the first stir I ended up with cornstarch all over the counter.  I wiped what I could back into the bowl and tried to be more careful...

While the cream continued to heat I prepped everything else.  Last time I made this, the next part went really fast. 
That white blog in front of the white bowl is the butter. 
Jonathan was sweet enough to take a picture while I tempered the eggs.  Then I dumped it all back into the pan and added the butter and vanilla.
Once it was all blended together the cream went into another bowl, I covered it with plastic wrap and stuck in the frig.
While the pastry cream chilled I made some other things which I'll blog about later. 

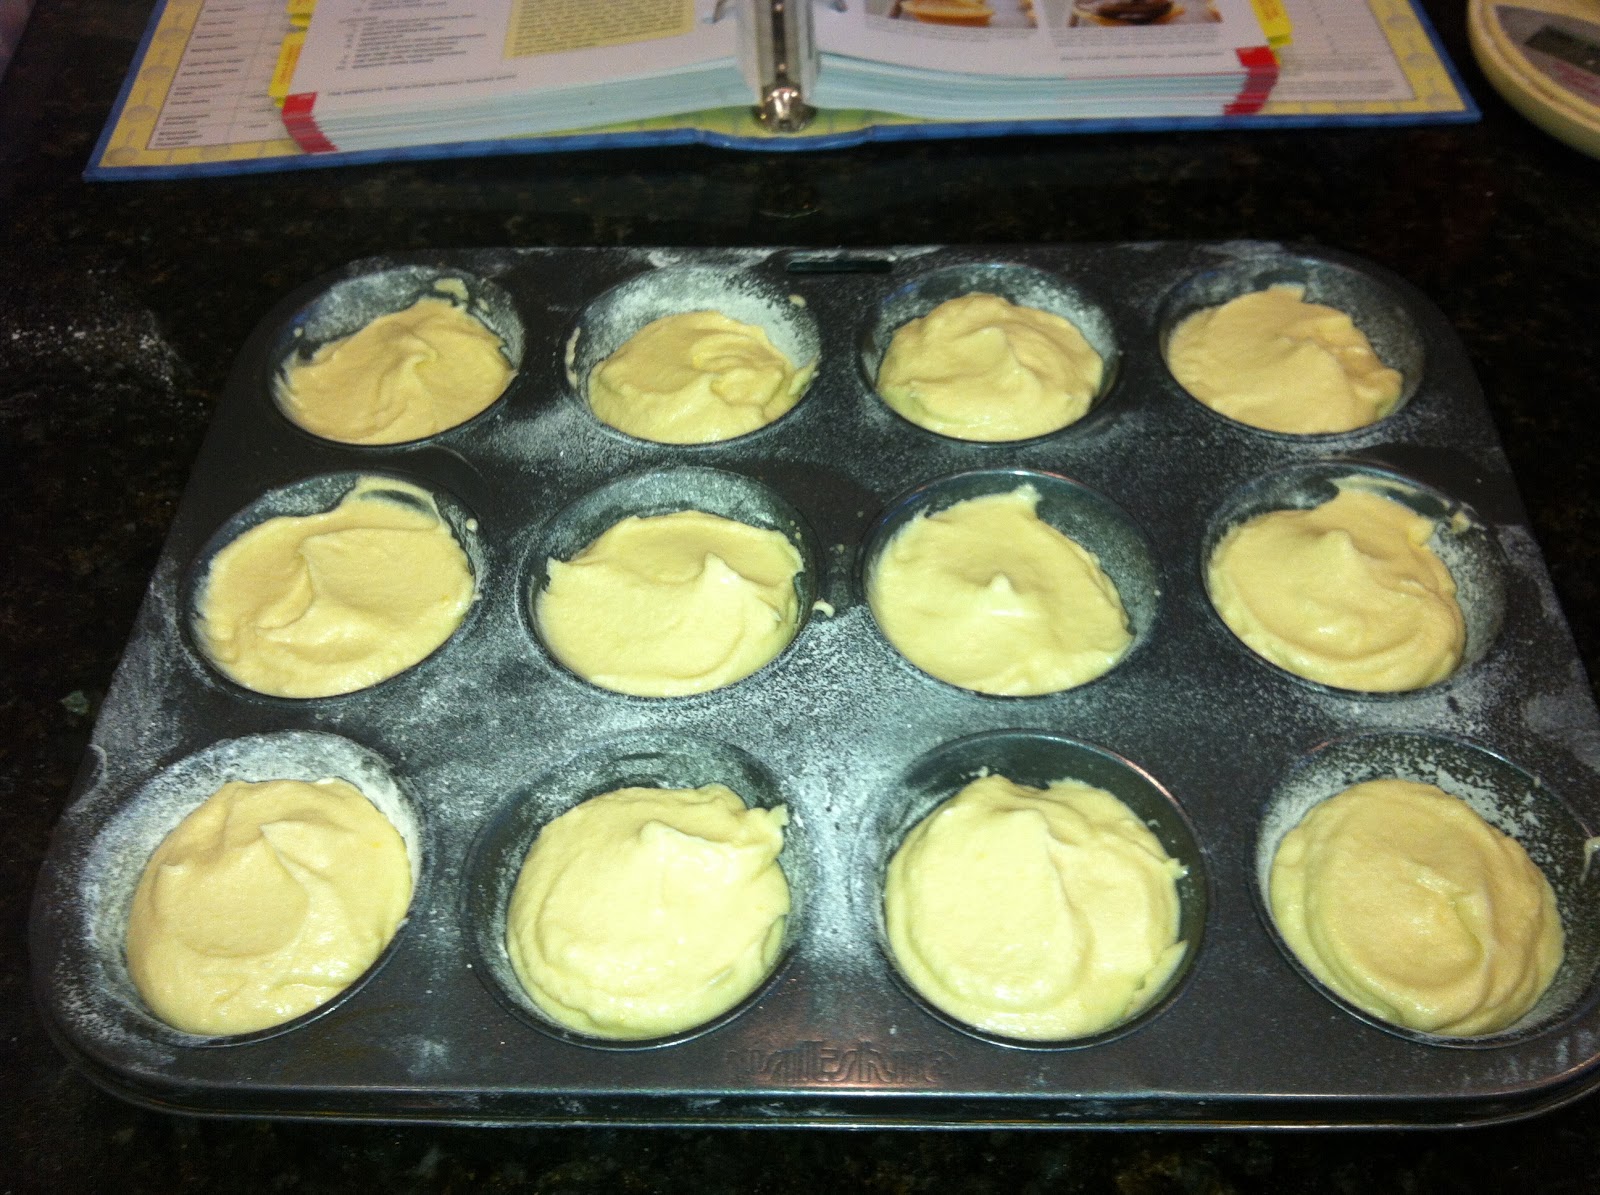
After about an hour and a half I started on the cupcakes.  I wanted to be sure that the cupcakes would come out clean so I was careful to grease and flour the cupcake tin as directed in the recipe. 
The cupcake batter was pretty straight forward.  Except I forgot to add the pieces of butter to the dry mix one at a time.
It took a little while but I finally got all the butter mixed into the dry ingredients.  There were a few bigger pieces but I figured it was good enough.
I mixed in the three eggs one at a time - at least I remembered that part.
It got really thick.  Then I dumped in milk and vanilla.  I didn't bother to buy whole milk.  I just used the 1% I had on hand. 
I didn't worry about using a 1/3 cup measure to load up the cupcake tin, I just tried to make sure I had an even amount in each cup and used up all the batter.
Twenty minutes later they were done.
After they had cooled ten minutes in the pan I moved them to a cooling rack.  While the cooled the rest of the way I made the chocolate glaze.
I used semi-sweet chocolate because I've found in past recipes that bitter sweet chocolate is too dark for me. 
While the chocolate glaze cooled I started loading up the cupcakes.
I didn't use up all the pastry cream.  I figured I only used about half of it.  But I made sure to use all of the chocolate glaze!  You just can't have too much chocolate.
Jonathan and I had as soon as they had chilled 10 minutes. 
As we finished Jonathan turned to me and said, "Janet... you somehow gave me an empty plate!"in a really pitiful voice.  :-)  So I got him a second one.  But I told him I was taking the rest to work to save us both from ourselves!

I worked up the nutrition information.  This is based on using only half the pastry cream, so take it with a grain of salt...
The over four hundred calories didn't stop me from eating every bite! 
 

Sunday, January 27, 2013

Spinach Artichoke & Roasted Red Pepper Cheesy Squares

I got this recipe from Averie.  Very colorful and made up of things that can be kept on hand.  Nice!

It's also a very easy recipe.  I whisked a couple of eggs, dumped in the artichokes (oil/juice and all), cut up the peppers a bit and dumped them in and then added the spinach.  I ended up buying a 16 oz bottle of peppers instead of a 12 oz, but I used all of them.  I also increased the spinach to about 1.5 cups. 
I added a cup of cheese and decided that was enough... after adding a half a cup of bread crumbs (Panko because that's what I had..)


I dumped the whole thing into a pan lined with aluminum foil and stuck it in the oven for about an hour. 

I forgot to get any pictures after I baked it.  Mine wasn't very square like...  I think I'd need more eggs to get it to set up like she did.  But I liked the flavor. 


Friday, January 25, 2013

Candy Bar Caramel Corn

I love that fancy popcorn with drizzles of chocolate and all sorts of extras mixed in.  So when I saw this recipe I knew I had to try it.  I've made caramel corn before and always used my super big bowl.


For the popcorn I used this great gift Jonathan and I got for Christmas this year from Mike & Julia.  It works great.  Nearly every kernal pops.  It only takes about three minutes in my microwave and a third of a cup gave me 8 cups.  I decided to double the recipe... so I made 3 batches. 

For the candy bars I used Peanut Butter Snickers...

Twix..

Kit Kats...

and butterfingers.

Once the popcorn was done

and the candy bars all chopped up and mixed

I started on the caramel. 

While the butter melted I covered a couple of half sheet pans in aluminum foil and sprayed them. 


The recipe doesn't specify a temperature or anything for cooking the caramel, just times.  But it worked out nice and hard, but that might be because of the baking step at the end. 

After the caramel was done I got Jonathan to dump it over the popcorn while I kept the popcorn moving so I got a pretty good distribution. 
I kept stirring until there wasn't any caramel puddled anywhere and the popcorn was covered pretty well.  Then I stirred in about half of the candy bars.  The caramel was still warm enough that the chocolate all melted. 

Then I spread the popcorn on the two prepared sheets and stuck them in the oven.  I stirred them after about 5 minutes and then cooked them for another 10 minutes. 

Cooking it in the oven melted all the caramel and peanut butter from the candy bars too.  The caramel set up really nicely.  I spread the remaing candy bar pieces and let the whole thing cool.

I managed to fill 30 snack bags with all this stuff.  Yum!  At about 200 calories it's perfect for a little snack/sweet... as long as I can stick to one a day.  :-)